當然一開始也是花上些時間,才發現原來真的是要認真看文件阿XD
開始使用之前先說一下流程如何進行:
1.安裝 Git與註冊一個GitHub帳號
2.設定/上傳 ssh key
3.最後使用command 或Gitbox tool 進行push or pull
1.安裝 Git與註冊一個GitHub帳號
首先就請大家先上GitHub註冊個帳號吧!接著開一個Project瞜
網站:https://github.com/

2.設定/上傳 ssh key
3.最後使用command 或Gitbox tool 進行push or pull
1.安裝 Git與註冊一個GitHub帳號
首先就請大家先上GitHub註冊個帳號吧!接著開一個Project瞜
網站:https://github.com/
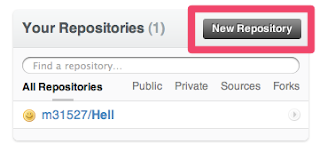
註冊完請開一個project吧!其實就是圖上的New Respository
開完之後呢!你就會看到你專案內有下面的步驟!其實跟著做就可以了,不過我們還有更重要的任務要做先來看吧
2.設定/上傳 ssh key
這裡只要跟著help頁面做就可以了http://help.github.com/mac-key-setup/
直到你做到跑出類似下面的頁面
$ ssh-keygen -t rsa -C "tekkub@gmail.com" Generating public/private rsa key pair. Enter file in which to save the key (/Users/tekkub/.ssh/id_rsa): Enter passphrase (empty for no passphrase): Enter same passphrase again: Your identification has been saved in /Users/tekkub/.ssh/id_rsa. Your public key has been saved in /Users/tekkub/.ssh/id_rsa.pub. The key fingerprint is: 01:0f:f4:3b:ca:85:d6:17:a1:7d:f0:68:9d:f0:a2:db tekkub@gmail.com The key's randomart image is: +--[ RSA 2048]----+ | .+ + | | = o O . | | = * * | | o = + | | o S . | | o o = | | o . E | | | | | +-----------------+
接著你在去下cat /Users/tekkub/.ssh/id_rsa.pub 應該會類似下面的加密碼
ssh-rsa AAAAB3NzaC1yc2EAAAABIwAAAdsfer31324erfewBMNG4DSj/sdf23fd few+x0O32YNgdUJQoigNdyktDHufOzAz89lPpT0+HCdwr5oxTYjVybF76Pcc/Vwoha4ewqrwefe324r2436qH4WjJWtypiSA2VDQOOFa9JeNL+1h+4Kxea1wlWdy0MPLYQr5X6UHrL214GHtlo0+QvZ2D9o9LygzMJr09NiOlXX1CltOmsSX4Lz/MhpG6g9VK9bA2i/alhClZqRmlZl6H4zaFqalFLND9/CWPo5iMldVjAIdCn9LcMIgXNrtoMLURmfAPlVcWwfvnyA1vh+aiOgEUxbHTA9RxTAJzMEBE2btFHmlQ== m31527@gmail.com
你就把這整段貼到Account Settings>>ssh public keys >> add another public key
然後記得title打mail瞜
如下圖
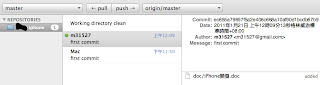
完成之後就可按照以下步驟進行瞜
Global setup:
Download and install Git git config --global user.name "m31527" git config --global user.email m31527@gmail.com
Next steps:
mkdir Hell cd Hell git init touch README git add README git commit -m 'first commit' git remote add origin git@github.com:m31527/Hell.git git push origin master
Existing Git Repo?
cd existing_git_repo git remote add origin git@github.com:m31527/Hell.git git push origin master
若在上面流程有出現master Permission denied (publickey) 這種錯誤,就是key問題!建議重新產生密碼瞜~另外產生密碼時輸入的密碼不要是空的比較好!
3.最後使用command 或Gitbox tool 進行push or pull
參考這裡瞜 http://www.gitboxapp.com/
補充說明:若要用command 方式將Project Clone、Push、Pull可用下面語法:
clone project(也就是cvs/svn上的checkout)假設我要把error.doc上傳至GitHub步驟1.將error.doc複製到專案底下步驟2.commandline 下 git add error.doc步驟3.commandline 下 git commit -m 'error file'步驟4.git push origin master接著看到訊息應該就沒問題了..pull (下載)
GitHub help參考網址 http://help.github.com/forking/


